Configuring the Message application in Program Canvas in Eloqua:
- Begin by logging into your Eloqua account
- Create a Custom Object Program under the 'Programs' button on your dashboard
- Open a blank Custom Object Program
- A dropdown menu will appear and have you choose the 'Custom Object Data Set' (or CDO) that will be used for the program. The CDO chosen should have records that contain the mobile numbers that messages will be sent to
-
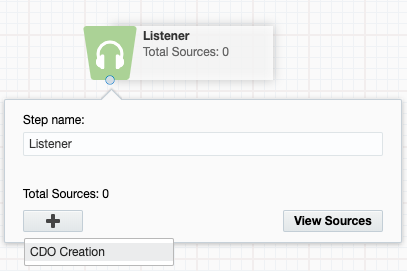
Users will be directed to a new program canvas. To begin, drag and drop a ‘Listener’ step into the campaign canvas
-
Double click within the Listener step to select the desired audience (in this instance, click the '+' button and select CDO Creation as the source - this will automatically drop newly created CDO records into the program)
- Click the arrow next to 'Program Steps' on the left of the page to view all available campaign steps
- Scroll down to the bottom of the Program Steps list and drag the 'Message: Twilio' application
 onto the program canvas
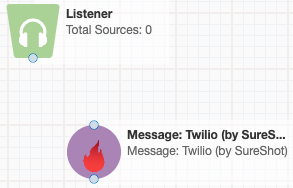
- Double click the Message step on the program canvas and click the pencil icon on the pop window

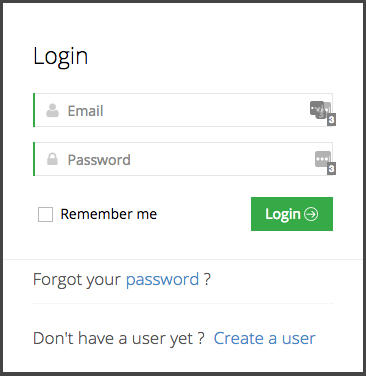
- A screen will appear that will take you to a login page for the Sureshot platform
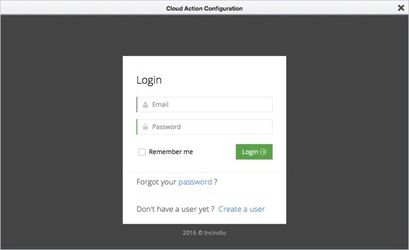
- Login using Sureshot platform credentials. Once logged in, the user will be taken to the first step of the Message app configuration screen
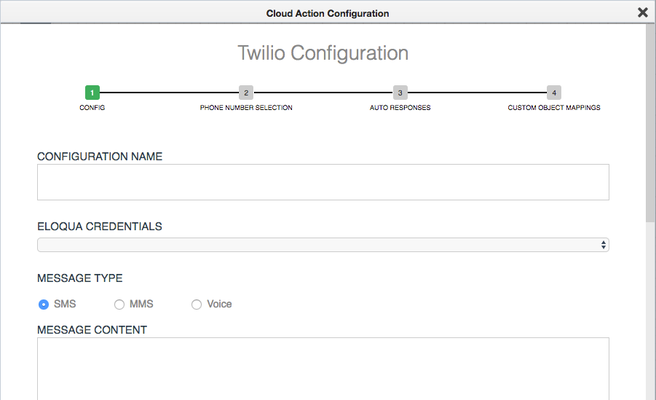
- Begin by naming the configuration (the Configuration Name will be logged with all returning message data. This allows the user to easily sort, report, or segment on data in Eloqua)
- Next, choose the corresponding Eloqua Instance from the dropdown menu by clicking the arrow in the Eloqua Credentials field
-
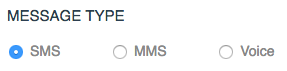
Select the Message type
- Begin typing your SMS message in the Message Content box. User may include Custom Object Fields from the 'program selected CDO' in the message content by selecting which fields in the corresponding dropdown menus
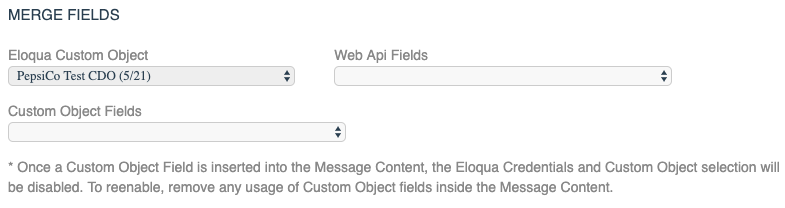
When a field is selected, a token for that field will be added into the Message Content box. When the text message is sent, the token will be replaced with the data designated for each individual contact for that field.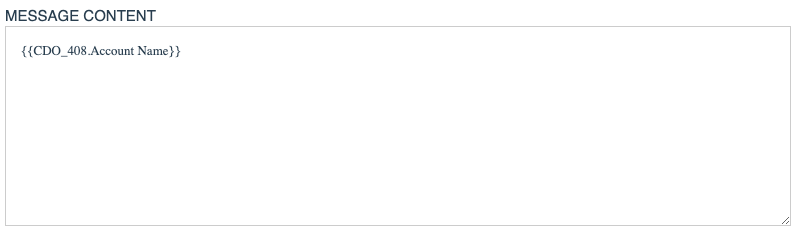
The application allows users to input web generated URLs into the Message Content:
- Click the 'Web API Fields' dropdown to input a 'get_url' token into the Message Content box. It will look like this:
{{get_url:}}
This get_url token will perform a HTTP GET request to the specified url and replace the entire tag with the content returned from the request.
- Input the main request URL after colon in the token, like so:
{{get_url:http://geturl.com}}
NOTE: If any of the parameter values in the request url contain special characters (like question marks, ampersands, etc.) it is recommended to wrap those URL parameter values with the encode_url() function. This is especially useful where one of the parameters to the main request contain a separate url (i.e. url shortening web api's). You add the encode_url() function around the URL parameter's value, like so: {{get_url:http://geturl.com/generate?longURL=encode_url(http://www.sample.com/landingpage)}}
- User is now also able to pull contact or CDO fields into the URL, just add a CDO or Contact Field token into the URL. For example:
{{get_url:http://geturl.com/generate?longURL=encode_url(http://www.sample.com/landingpage?SMS={{C_MobilePhone}})}}
NOTE: When using the encode_url function, do not 'nest' it, meaning do not put an encode_url function inside of another encode_url function.
- Click the 'Web API Fields' dropdown to input a 'get_url' token into the Message Content box. It will look like this:
- Once the Message Content has been created, the user can click 'Next' at the bottom of the page
- On the next page select a phone number to send messages from. Only phone numbers in the account will show in the list
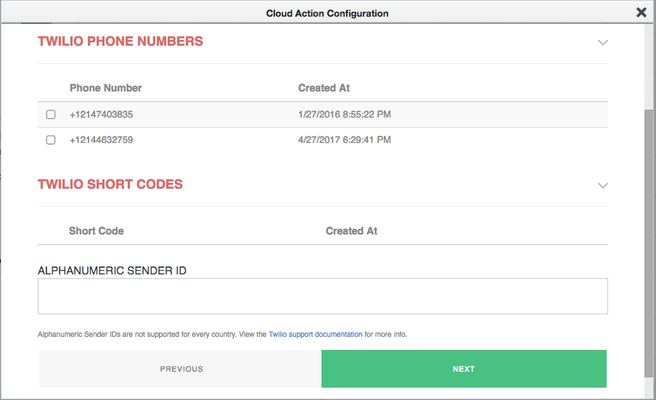
NOTE: Alphanumeric Sender ID is only available in specific countries, please click the 'Twilio support documentation' button for more information - Once a phone number is selected, click the 'Next' button
- On the third page of the configuration, the user will create auto responses for this specific campaign. (Global Autoresponses are available to edit on the main dashboard)

- In the first section, the user may enable a Default Auto Response. (When enabled, Default Auto Response Messages are delivered to a contact when they reply to messages sent by this configuration unless a specific auto response is triggered by a keyword. Default Auto Response messages may also be enabled for non-Eloqua contacts that send in messages to a specific 9-digit number or short code.)
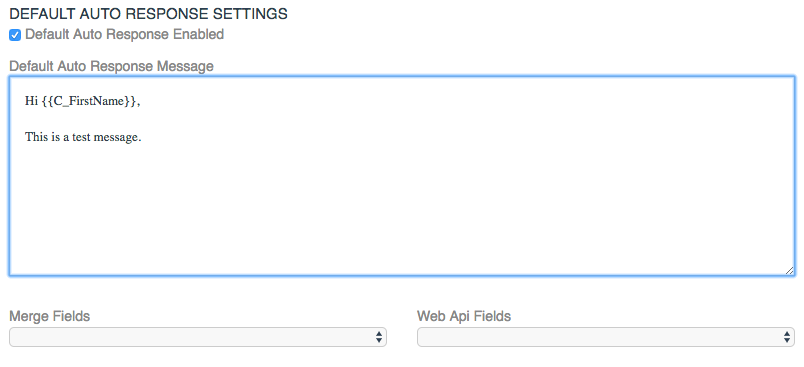
NOTE: User may merge any 'program specific CDO' fields and input web generated URLs by choosing designated drop down menus - the inclusion of field merges in auto-responses will result in the app requiring the recipient of the auto-response to have previously been sent a message from the Message app
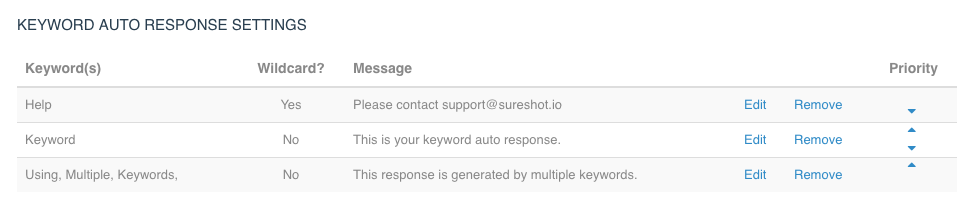
NOTE: HTML Logic may be used for further customization of CDO tokens. Please refer to the Sureshot SMS Eval Syntax Guide for more information. - The second section allows you to create Keyword Auto Responses (The Keyword Auto Response will be delivered when a user replies with a specific keyword designated here. Input the Keyword and Keyword Auto Response Message, then click 'Save Response')
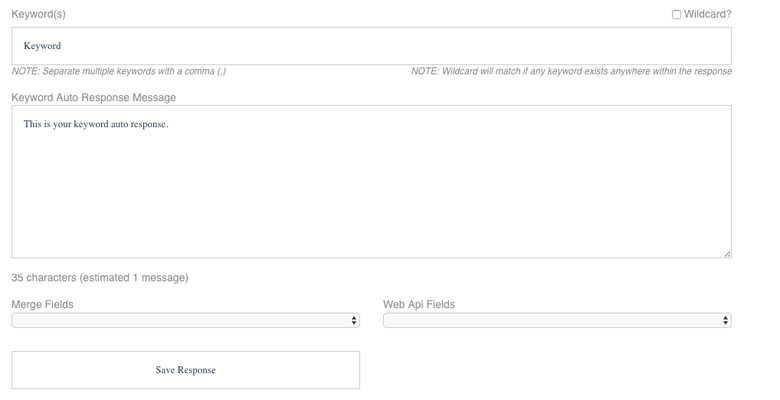
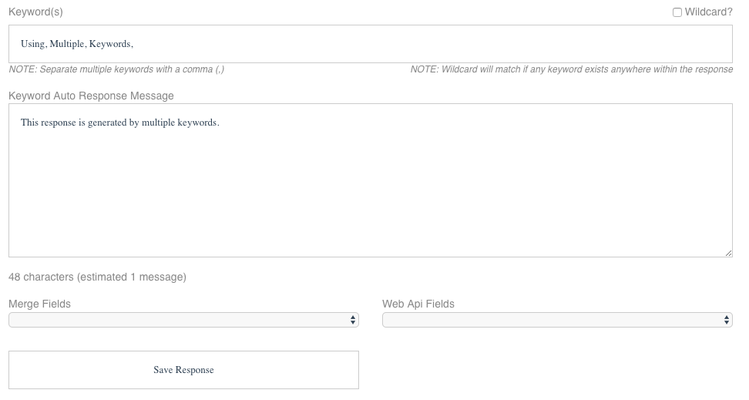
- The user may create multiple keywords for a single response, separate keywords using a comma (,)
- The user may choose to designate the keyword as a Wildcard keyword be checking the "Wildcard" box at the right of the Keywords field. If a keyword is designated as a wildcard the application will send the message if it detects the keyword in any response. For example, if Help is a wildcard keyword and user texts in "help", "help me", or "I need help" all three would receive the response designated for help
- Saved responses will appear above this section of the page. The user may also set the priority of these responses using the arrows under the "priority column
NOTE: You're also able to merge 'program specific CDO' fields and input web generated URLs by choosing designated drop down menus - the inclusion of field merges in auto-responses will result in the app requiring the recipient of the auto-response to have previously been sent a message from the Message app
NOTE: Global Keyword Auto Responses are created by logging into app.incindio.com and selecting the 'Global Configuration' button in the Dashboard when managing the Twilio application - Global Keyword Auto Responses will oversee all Eloqua campaigns. The application will check for Global Keywords first before checking Keywords in a specific campaign
NOTE: Keyword Auto Responses may be designated for specific phone numbers by logging into app.incindio.com and clicking the 'Phone Numbers' button in the Dashboard. Edit the phone number and connect that phone number to a specific pre-built configuration with the Keyword Auto Responses already created
- The user may create multiple keywords for a single response, separate keywords using a comma (,)
- Once all auto responses have been created, click the 'Next' button at the bottom of the page
- On the last step of the configuration select the separate Eloqua Custom Object where all transactional data will be written.

-
-
- Once you have mapped all of the fields, click 'Submit' at the bottom to save the configuration
- The configuration isn't fully saved until you see the 'Configuration Complete..You May Close This Window Now' page
- The 'Test' button on the bottom of the configuration page cannot currently be utilized in Program Configurations- testing must be completed through the Program Canvas
-
After clicking 'Submit' on the configuration you'll be redirected to a 'Configuration Complete..You May Close This Window Now' page. The configuration has now been completed. You can now create new CDO records, and those records will drop into the program and thus into the SMS step. The phone numbers in those records will be sent the text message in the first 'Message Content' box
Administrative Features in the Incindio Platform
- The user may configure settings for the SMS Application within the Incindio platform. To access the account, go to https://app.incindio.com
- Login using Incindio credentials
- Click the ‘Dashboard’ button on the left side of the page
- Click the 'Manage' button to the right of the 'Message: Twilio' integration

- A list of buttons will appear that allows you to configure your SMS Application

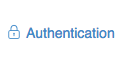
To View Your Account SID and Authorization Token
- Click the ‘Authentication’ button
To Edit a Phone Numbers' Auto Response
- Click the ‘Phone Numbers’ button

- Click the checkmark box next to a particular number, and click the ‘Edit’ button

- On the next page, you'll see an Auto Response Message field and a Configuration Mapping dropdown menu
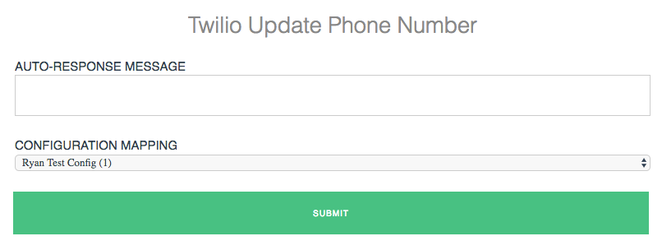
The Auto-Response Message field will be the text sent back to customers who text in to the selected phone number and are not attached to any campaign or configuration.
The Configuration Mapping dropdown lets you choose a specific pre-made configuration with Keyword Auto Responses to attach to the selected phone number.
When someone texts in to a phone number listed in your account, this is the hierarchy the app will go through to send a response:
-If the contact has received a text from a configuration in a campaign and has sent a keyword in the configuration, it will send that Keyword Auto Response
-If the contact has not received a text from a configuration, the app will check for keywords in the configuration mapped to the phone number from the Edit Phone Number screen
-The app will then check for Global Keyword Autoresponses in the 'Global Configuration' screen
-If there are no Global Keyword matches, the app will check to see if there is a Default Auto Response from a configuration to send
-If the configuration doesn't have an active Default Auto Response then the app will reply with the Default Auto Response found within the Edit Phone Number screen -
Enter the Autoresponse Message or select the configuration you would like to map to the phone number, then click 'Submit'
To Create a New United States Phone Number
- Click the ‘Phone Numbers’ button
- Click the 'Create New' button
- Enter the three digit area code you would like the phone number to have, then click 'OK'
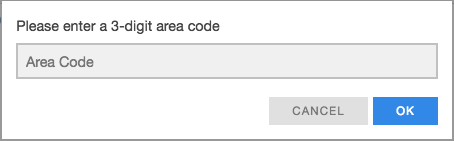
- Refresh the webpage and your new phone number should appear in the list below
To Setup a Global Keyword Auto Response
- Click the ‘Global Configuration’ button

- From this page, you have the ability to enable auto-generation of phone numbers (Note: When sending mass numbers of text messages per day, generally over 250, we recommend enabling auto-generation of numbers. This feature will generate new phone numbers to send your messages from, and thus will stop phone carriers from potentially blocking your messages from being sent)
You should then choose the default area code and country code you would like to designate for the Global Auto Response.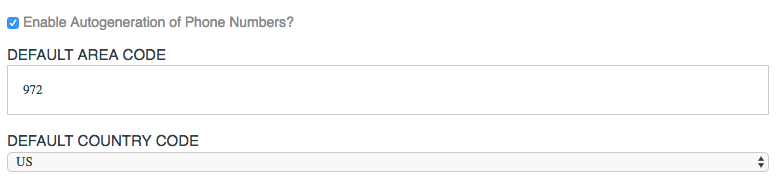
- Next, input the Keyword and Keyword Auto Response Message you would like to setup

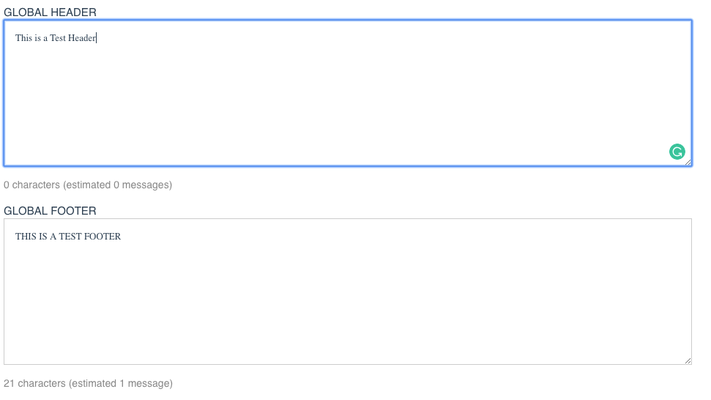
- To add multiple Global Keyword Auto Responses, click the ‘Add New Response’ button. The application option of adding a Global Header or Footer. Text in the Global Header text box will appear at the top or bottom of all SMS messages sent through all Eloqua campaigns.
- The user may also add preset web API generated values. Simply click the 'Add Web API Field' button and input the correct information, then click 'Create'

- Once completed, click the 'Submit' button at the bottom